
#
Eureka Client

This tutorial explains how to create a Spring Cloud Eureka Client. This tutorial contains an example as well.
Eureka Server is a service registry. Here all the clients will be registered, and they could communicate
using their "service name" and not using their "hostname". This service registry acts as a central location where
the clients will send information about their existence. If their IP change, this will be registered in that
central location.
In this tutorial I will show how to create a Eureka client and how to register to a Eureka server.
First of all I will create a simple Spring Boot application using spring initializr
as in the image below:
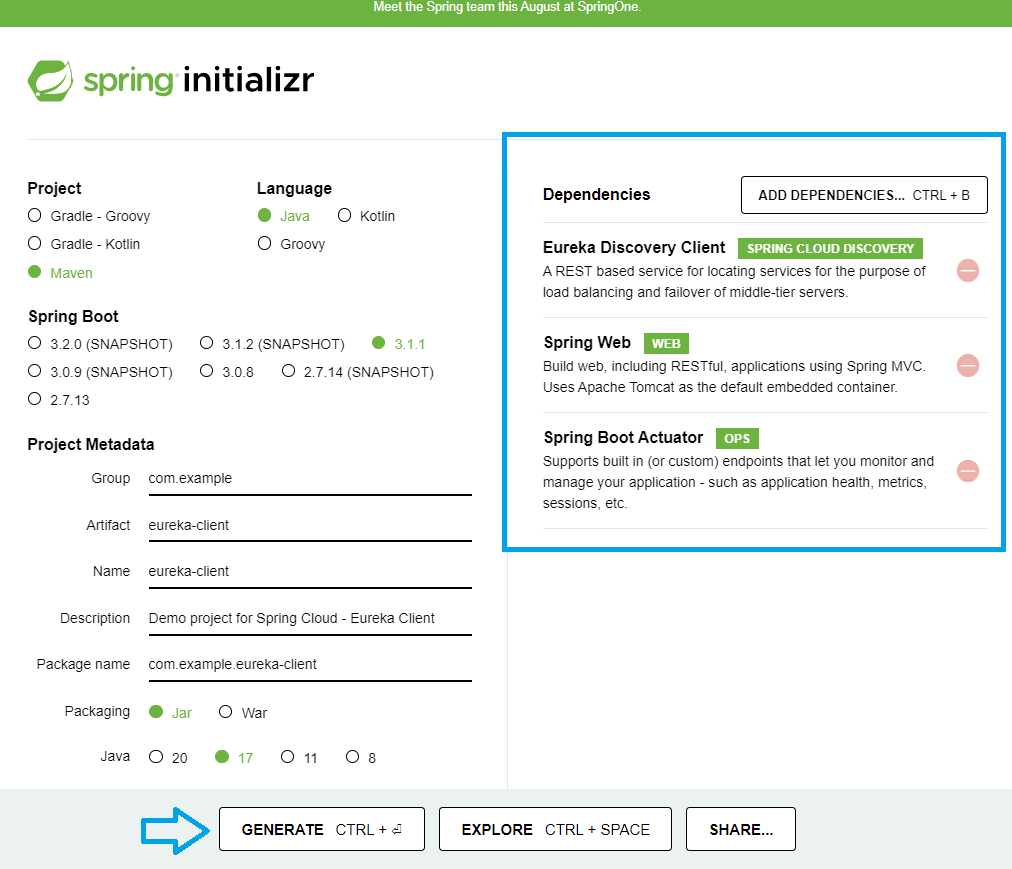
Info
Even if Spring Actuator is not used directly by Eureka, it is good for checking the health of the service.
The implementation of a Eureka Client is very simple.
Now we need to add @EnableEurekaServer annotation to the main class of the application.
Now the main class will look like this:
package com.example.eurekaserver;

import org.springframework.boot.SpringApplication;
import org.springframework.boot.autoconfigure.SpringBootApplication;
import org.springframework.cloud.netflix.eureka.server.EnableEurekaServer;

@SpringBootApplication
@EnableEurekaServer
public class EurekaServerApplication {

	public static void main(String[] args) {
		SpringApplication.run(EurekaServerApplication.class, args);
	}

}
We need to add the following in the application.properties of the Eureka Client application:
server.port=8201
spring.application.name=Eureka-client-1
eureka.client.serviceUrl.defaultZone=http://localhost:8761/eureka/
8100 : the port Eureka client is running
Eureka-client-1 : the name of the client/service
localhost:8761 : the socket where Eureka server is running.
That's all.
Now we start Eureka Server & Client, and we put http://localhost:8761/ address in a browser.
In Firefox, I can see the following :
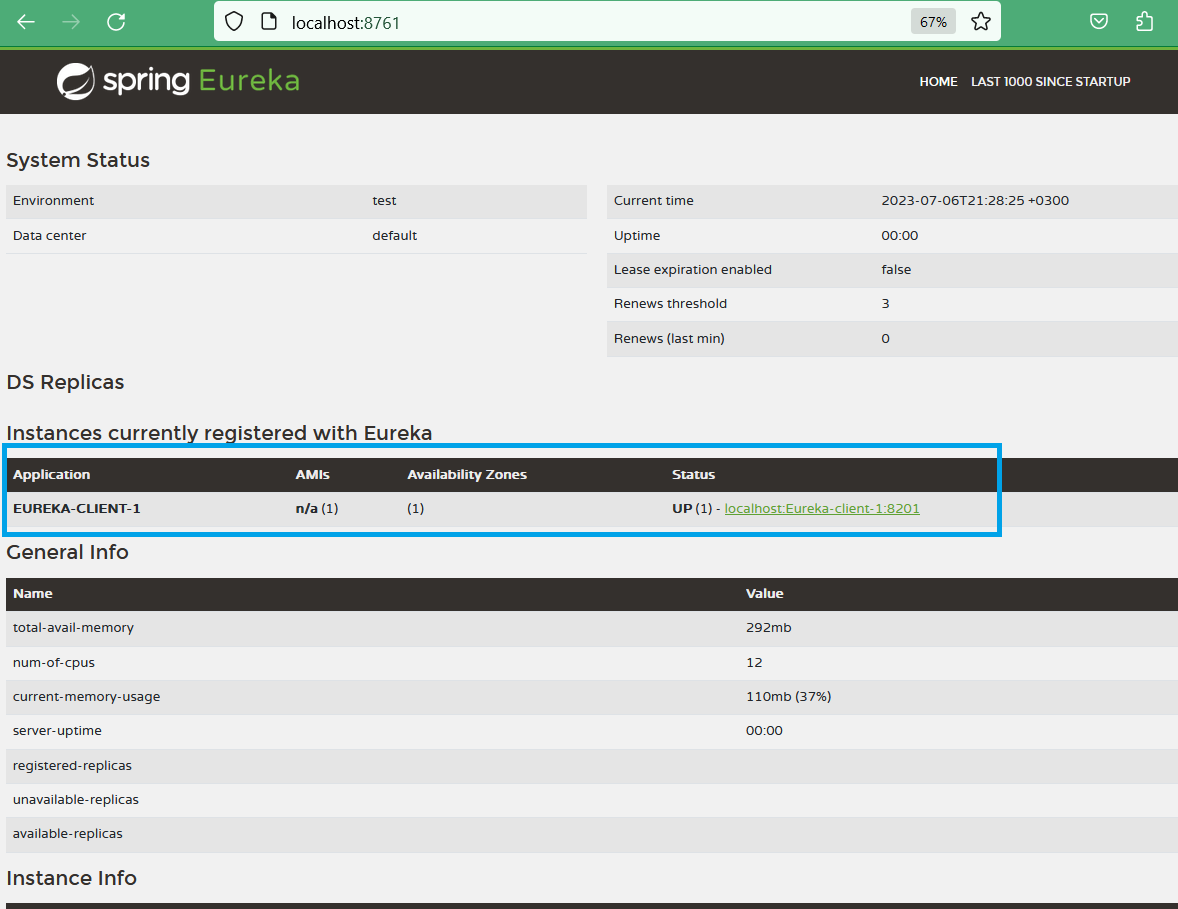
So, the client is registered with Eureka Server ! Enjoy !