
#
Spring Security 6 : Implementing OAuth2 with Keycloak

This tutorial explains how we can implement OAuth in Spring Boot using Spring Security 6 and Keycloak 20.
Info
For this tutorial I use Maven, Java language, Spring Boot 3.1.1 version and Java 17.
#
OAuth2 - Overview
OAuth 2.0 (which stands for "Open Authorization") is the modern standard for securing access to APIs. OAuth2 works over HTTP(S) and authorizes devices, APIs, servers, and applications with access tokens rather than credentials.
In the OAuth2 authorization flow we can count 4 components/actors:
the
resource server: the server which contains APIs (resources) which can be accessed.the
user/ resource owner: the owner of the APIs (resources) which are shared on a resource server.the
client: an application which want to access one resource from resource server.the
authorization server: the server which let or not the client to access resources from the resource server.
The main idea is that the client must obtain an access token from the authorization server and use it in order to
access a resource from the resource server.
There are multiples ways a client could obtain an access token.
Info
The grant type basically refers to the way a client gets the access token.
The most common OAuth2 grant types are:
Authorization code : before a client needs to access a resource, it will let the user interact with the
authorization server for letting the client access the resources he has access to. In this case, the
authorization server will send the token to the client and the client could use it in order to access
some resources. This is the most used grant.
Password : the client knows the credentials of the user and use them in order to receive the access token.
Client credential : the user doesn't participate in the authentication phase. We are using only the
client credentials in order to get an access token.
Refresh token : when an access token expires, the client could use a refresh token in order to ask for a
new access token. When the client receive the access token, it receives also a refresh token.
#
Keycloak installation
Keycloak is an Open Source Identity and Access Management. Here we keep the clients, the usernames and the roles
assigned with the username. In the OAuth2 architecture Keycloak acts as an authorization server.
In order to install Keycloak, we need to go to
www.keycloak.org/downloads and download the software.
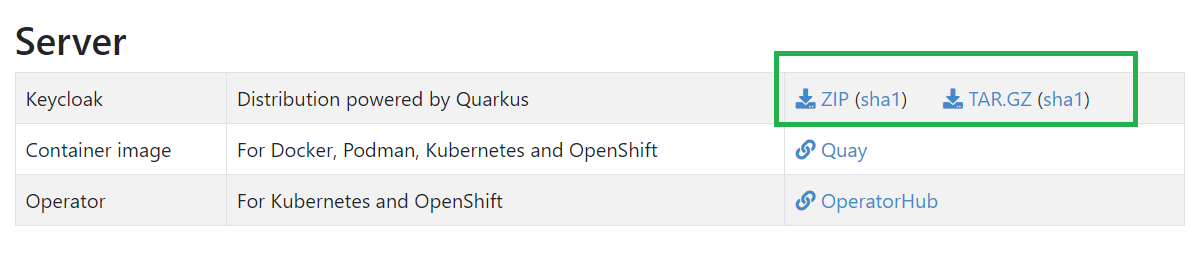
In my case I downloaded the zip file. After that we need to unzip the file into a specific location and run the following command from "bin" directory:
kc.bat start-devIf you have Docker/Docker Desktop installed on your computer, you can use a container image for making Keycloak run.
We need to run the following commands:
docker run quay.io/keycloak/keycloak start-devMore information you have here.
#
Keycloak configuration
By default, the port used is 8080, so, in my case I will access the Keycloak at http://localhost:8080. When we access Keycloak for the first time we need to define the admin username and password.
Once connected to Keycloak, we click on "Administration Console" and we will see something like this:
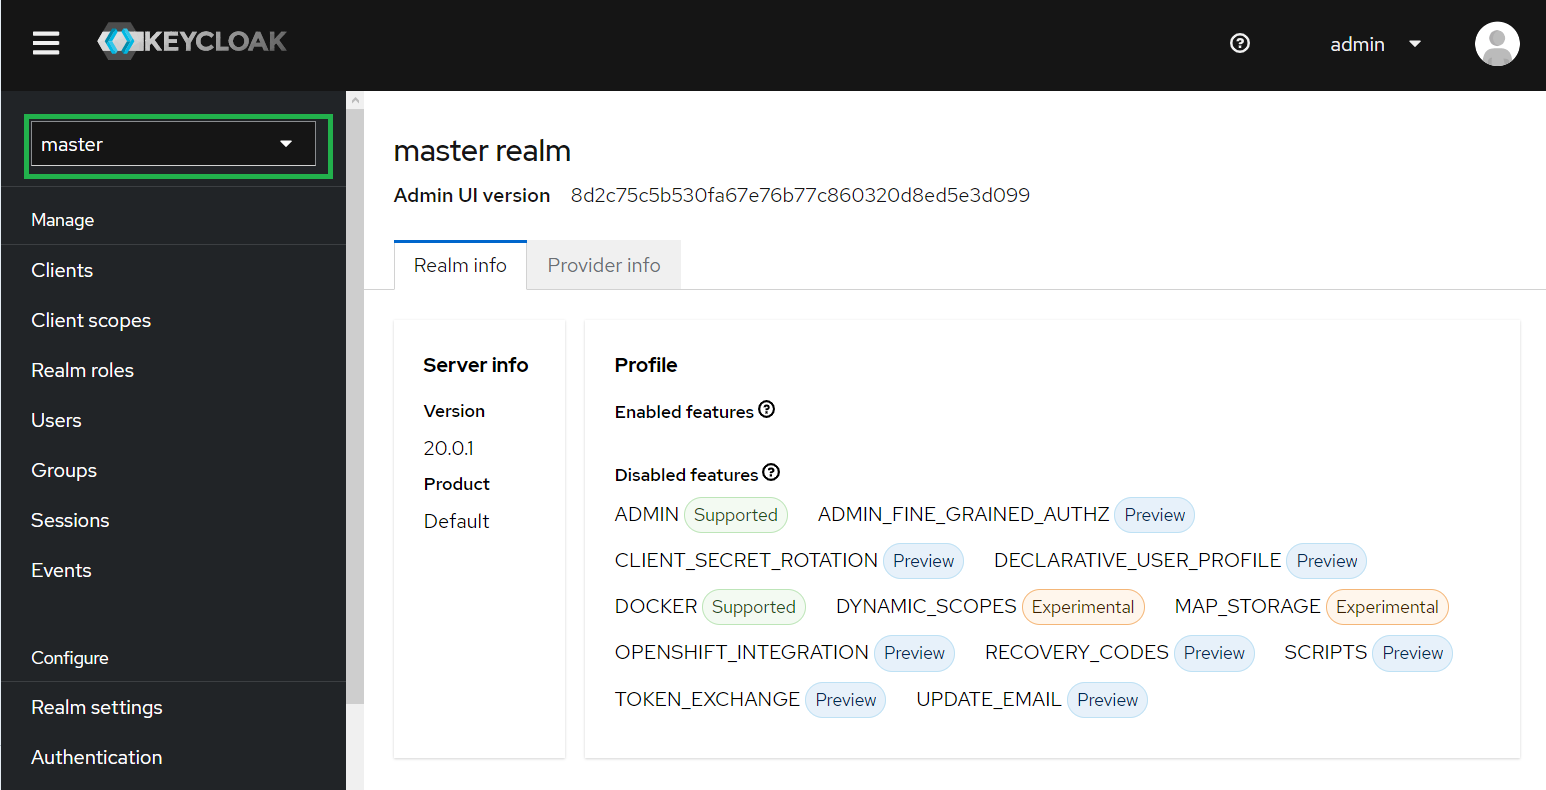
I will create a new realm. This will be done, by clicking on "master" and after that on "Create Realm" button.
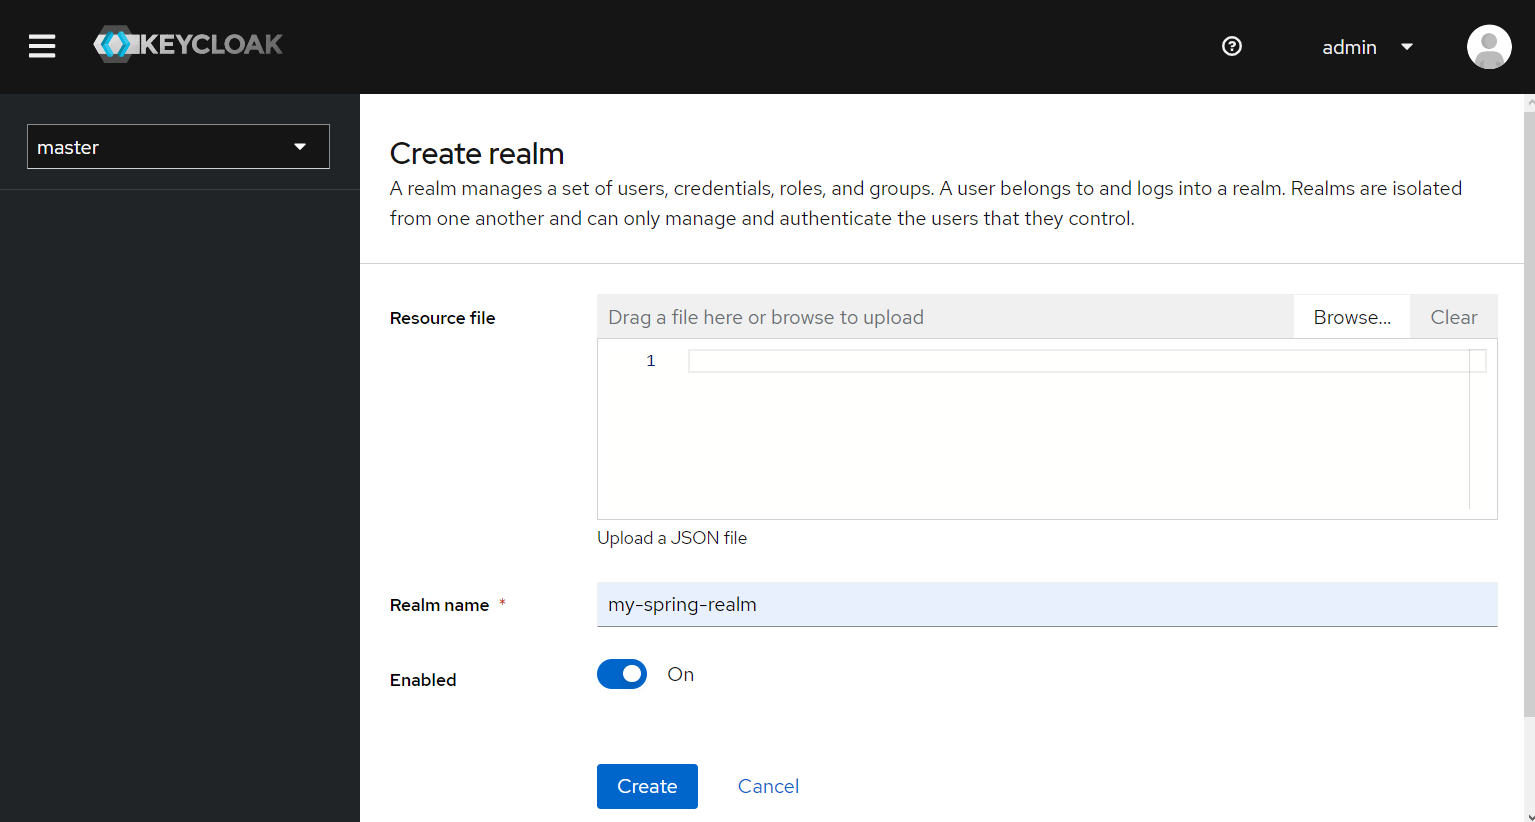
We choose a name for the realm, and we click on "Create" button. At this point the realm is created.
Info
A realm manages a set of users, credentials, roles, and groups. A user belongs to and logs into a realm. Realms are isolated from one another and can only manage and authenticate the users that they control.
Once we have created a realm, we can define/create a client.
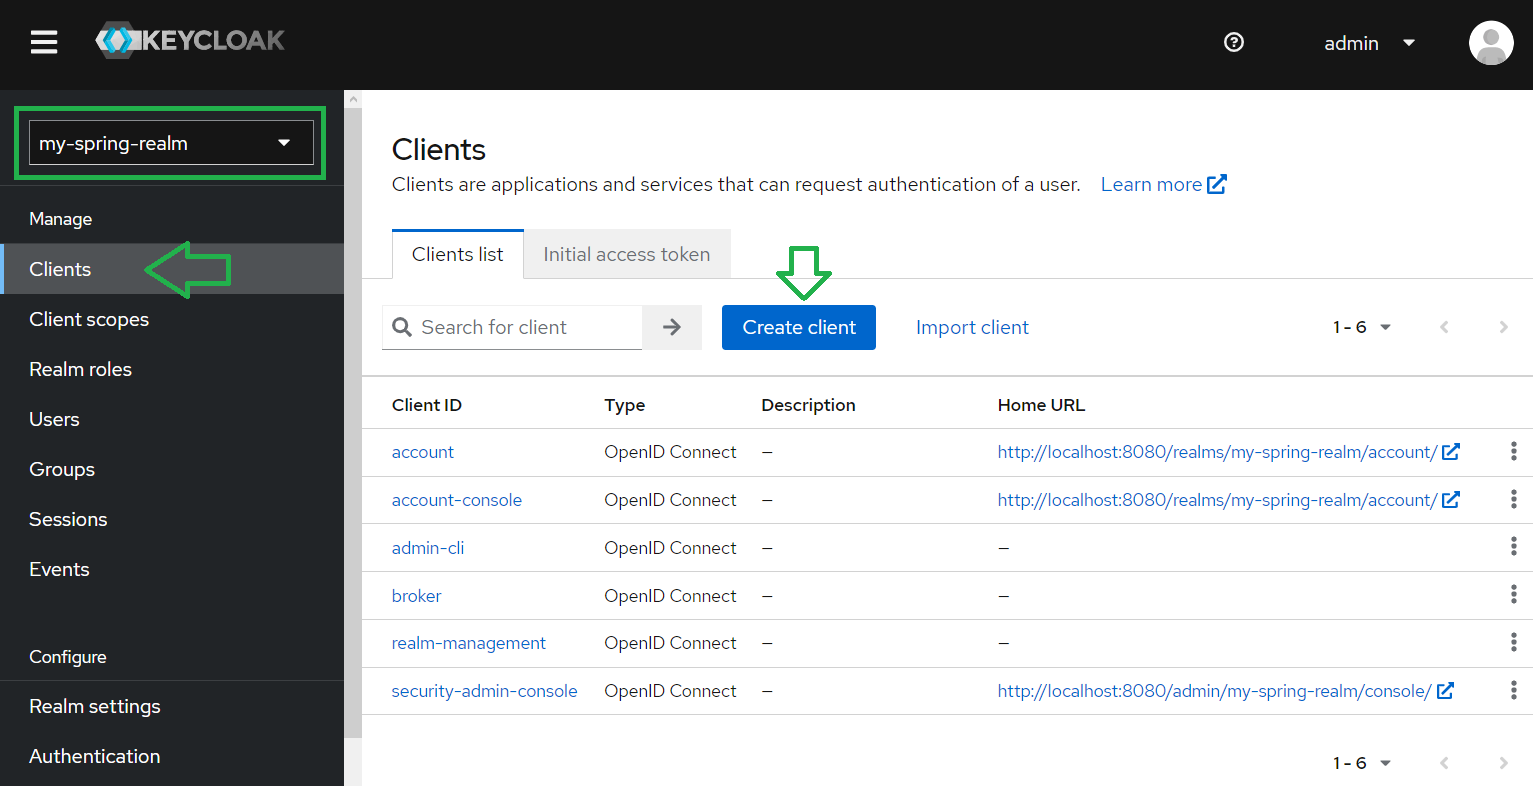
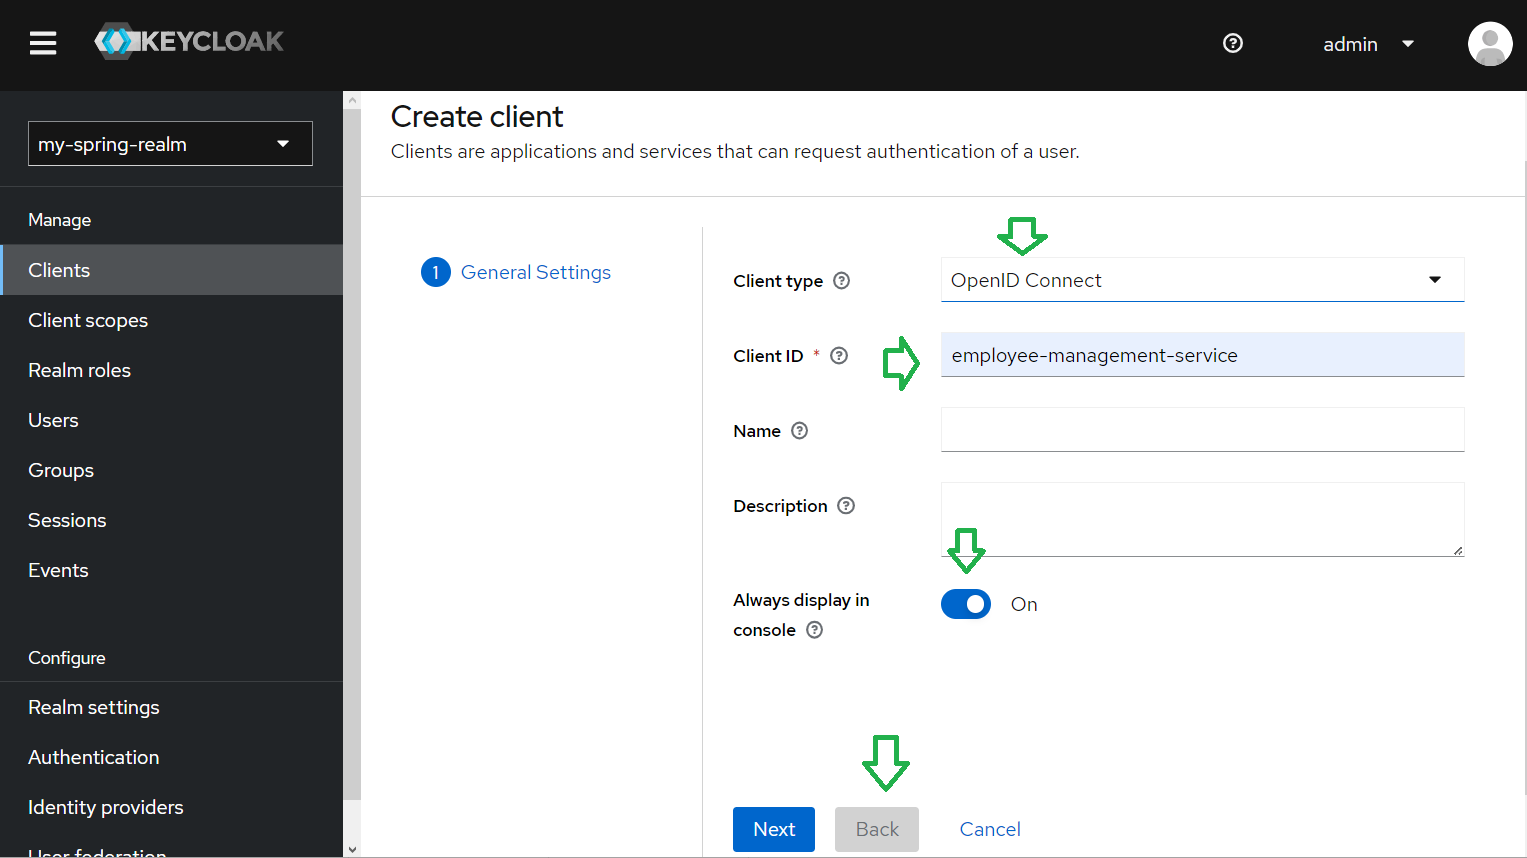
We enter the General Settings.
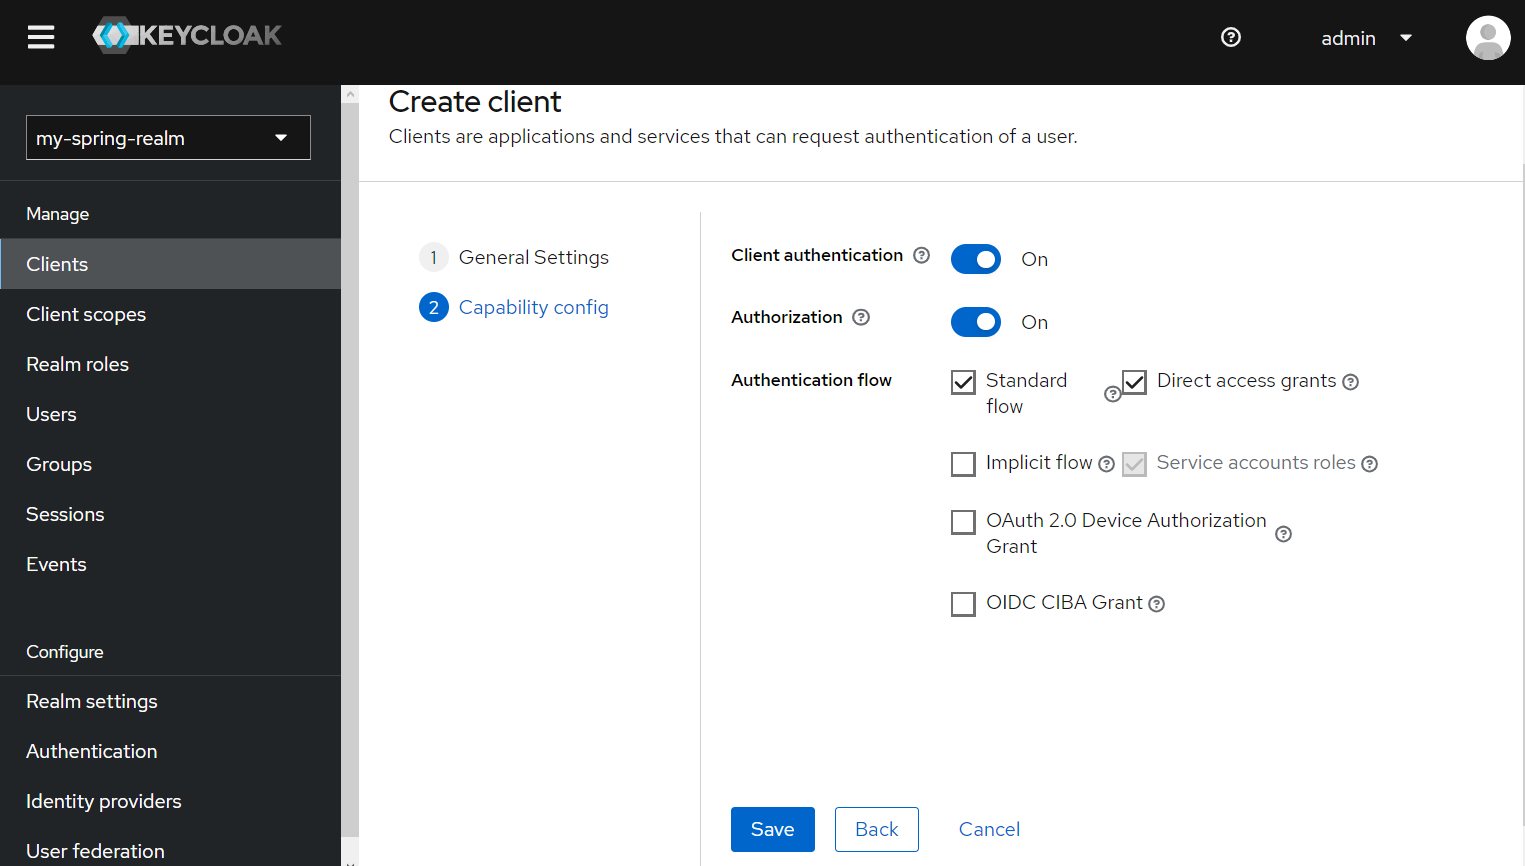
And we config the client. Click on "Save" button.
We enter into another window where we need to set:
Root URL: http://localhost:8080/ Home URL: http://localhost:8080/ Valid redirect URIs : http://localhost:9000/* Web origins : *
Info
8080 is the port Keycloak is running. Our application (resource server) is running on port 9000.
Both are running on localhost.
Click on "Credentials" tab and you can see the client secret generated for the client.
From the "Settings" tab click on "Save".
Now, click on the "Users" (on the left menu) and after that click on "Add User". Give a name to the user ("user1-r" in my case) and click on "Create" button. In the same manner I create "user2-w" user. Also, from "Credentials" tab we need to add a password for each user. In my case the password is "u".
Now let's create 2 roles. Click on the "Realm roles" (on the left menu) and after that click on "Create role". Give a name to the role ("read" in my case) and click on "Save" button. In the same manner I create "write" role.
Now we go to each user and add a role to the users. This is done from the "Role mapping" tab from "User details". "user1-r" will have the role "read" and "user2-w" will have the role "write".
#
Keycloak testing
Now we can test Keycloak from Postman, but before let understand what a token endpoint is.
The token endpoint is used to obtain tokens. Tokens can either be obtained by exchanging an
authorization code or by supplying credentials directly depending on what flow is used.
The token endpoint is also used to obtain new access tokens when they expire. More information about
token endpoint you have
here.
In my case, the token endpoint is :
http://localhost:8080/realms/my-spring-realm/protocol/openid-connect/token, where "my-spring-realm" is the realm
I have created in order to keep the users and the roles.
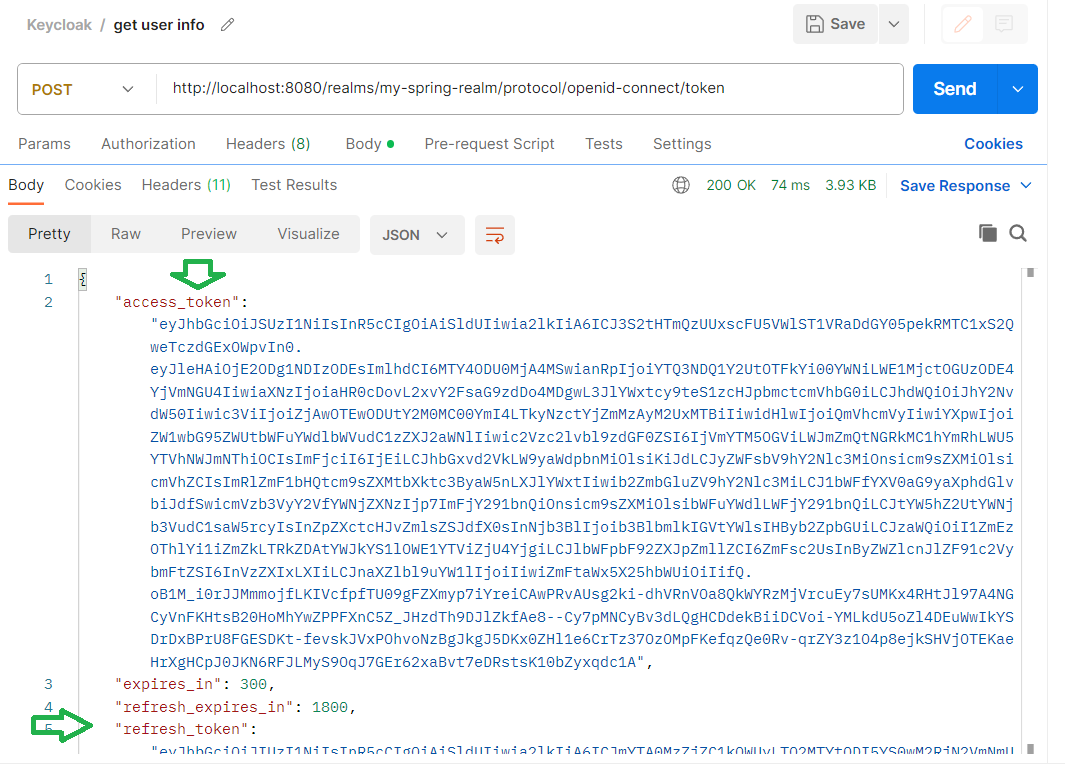
To obtain the client access token, in Postman we can run the following request :
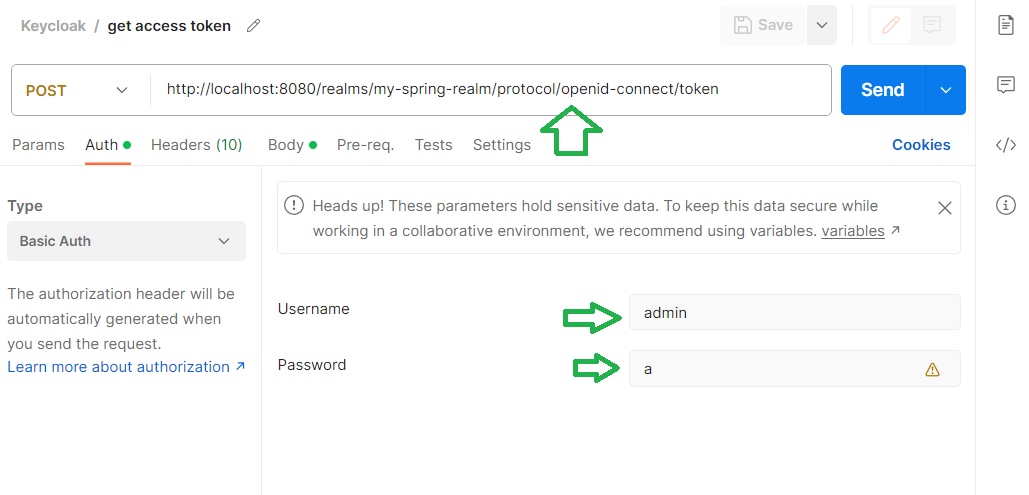
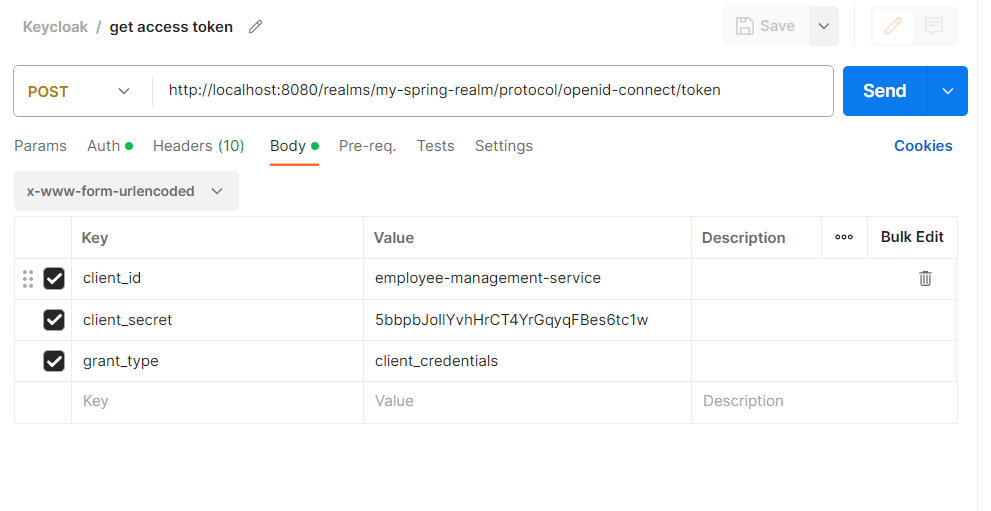
You execute the request, and you will get the following response:
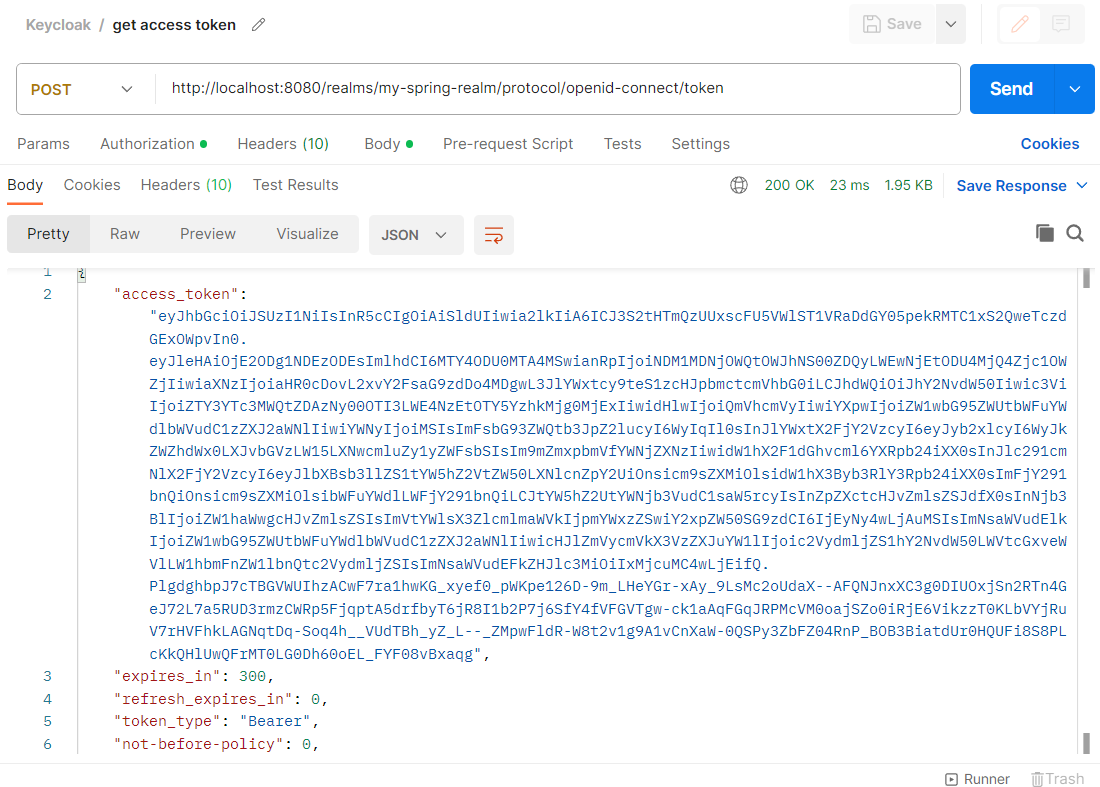
If you take the access token and decode it on jwt.io you will see the content of the access token. It will be something like this:
{
  "alg": "RS256",
  "typ": "JWT",
  "kid": "wKkGNd3QLlpU9UiROUQh7FcNizDLL-qKd0y73ta19jo"
}.
{
  "exp": 1688540225,
  "iat": 1688539925,
  "jti": "a1fdd0cf-488f-475d-b24d-695fc8849b5e",
  "iss": "http://localhost:8080/realms/my-spring-realm",
  "aud": "account",
  "sub": "e67a771d-d037-4927-a871-969c8d284211",
  "typ": "Bearer",
  "azp": "employee-management-service",
  "acr": "1",
  "allowed-origins": [
    "*"
  ],
  "realm_access": {
    "roles": [
      "default-roles-my-spring-realm",
      "offline_access",
      "uma_authorization"
    ]
  },
  "resource_access": {
    "employee-management-service": {
      "roles": [
        "uma_protection"
      ]
    },
    "account": {
      "roles": [
        "manage-account",
        "manage-account-links",
        "view-profile"
      ]
    }
  },
  "scope": "email profile",
  "email_verified": false,
  "clientHost": "127.0.0.1",
  "clientId": "employee-management-service",
  "preferred_username": "service-account-employee-management-service",
  "clientAddress": "127.0.0.1"
}.
{
  "e": "AQAB",
  "kty": "RSA",
  "n": "yyc0F3W_wdf94vNbGQ8X6D6HVTHuT5rXkjk67tFiUfiIskWH1k8jB9heHANjK-aF091mWQlp0itUoqhKQBf4PPQr4lBPqgqszP1bdufetOUqqXdthYCvPs9g3UcKRidYlQMUyHTcUsbWbc1Z_b_qdyMYCijPNh7GtSD7y9DQDX7O9DXsE9mcCyBtKdJKTytb9iTT60O0hTO7AQ8CeP5tr1OeSaU7Z5ZO4bG09wgKg3jMJbtWMwiAQxLYWuRiEnYtW_CwsUdJvFoNuZRXf-V04u90BQSTxriT4xFFxuj4o7J2G_hAxmD5HB7EVr3AoyL3IeRGwOtbBd-hDpeKDQW-nQ"
}
To obtain a user access token, in Postman we can run the following request :
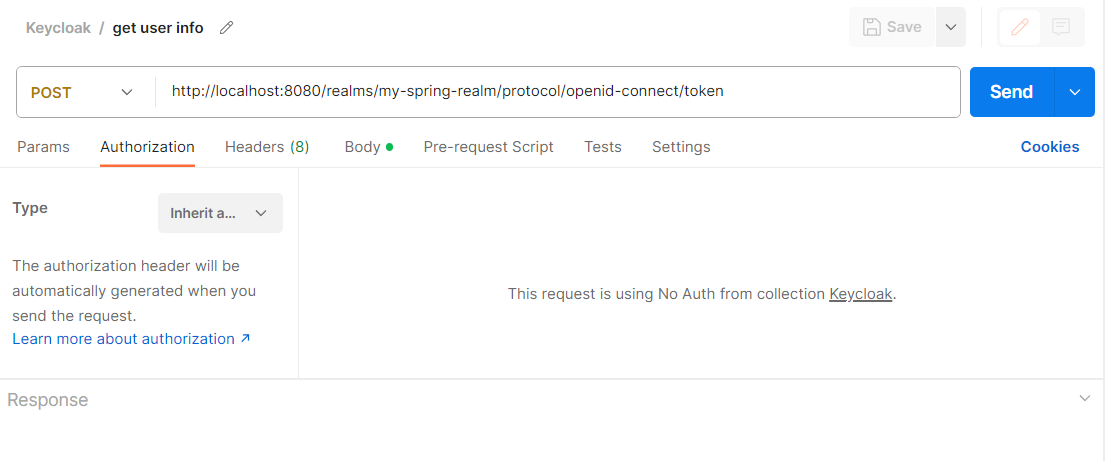
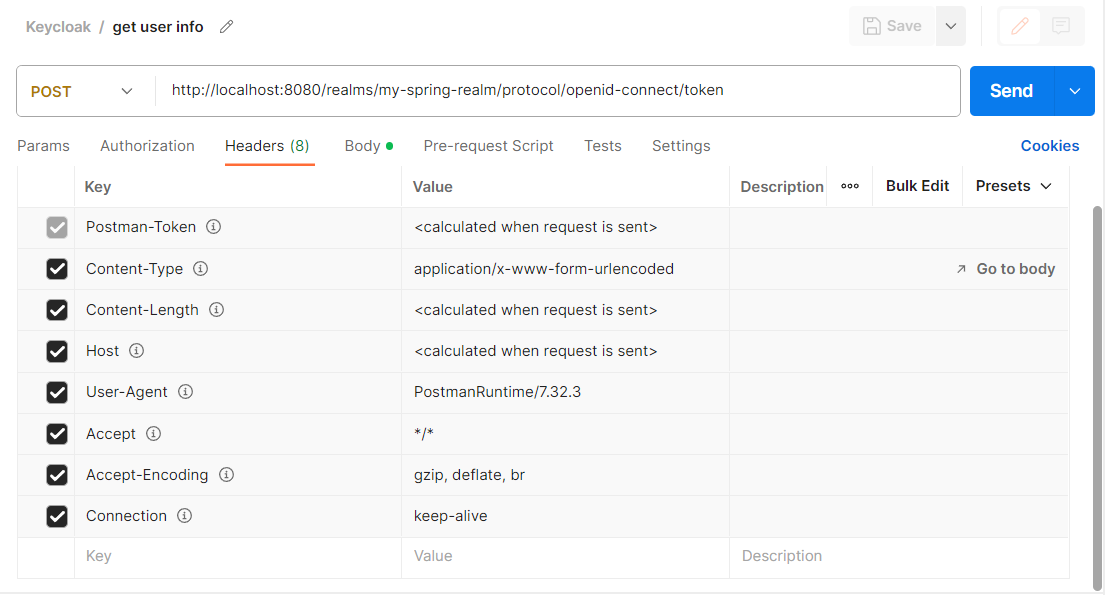
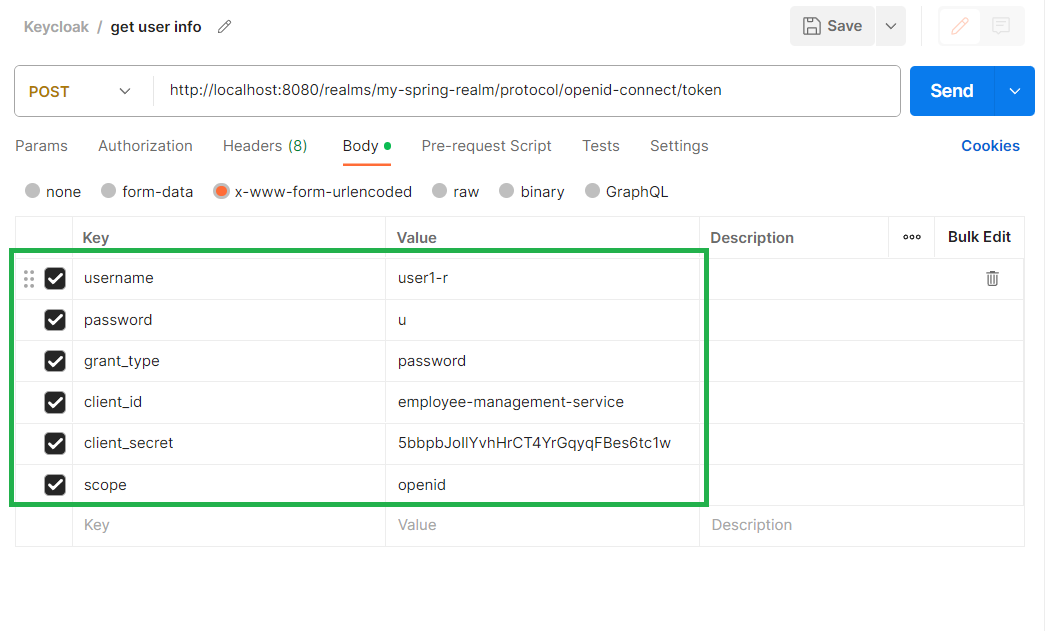
You execute the request, and you will get the following response:
If you take the access token and decode it on jwt.io you will see the content of the payload. It will be something like this:
{
  "exp": 1688542381,
  "iat": 1688542081,
  "jti": "a47445ce-91db-4acb-a527-8e3818b5f4e8",
  "iss": "http://localhost:8080/realms/my-spring-realm",
  "aud": "account",
  "sub": "f0091085-cc40-4bb8-9277-b6f3023e110b",
  "typ": "Bearer",
  "azp": "employee-management-service",
  "session_state": "5fa398eb-bffd-4dd0-abda-e9a5a5bf58b8",
  "acr": "1",
  "allowed-origins": [
    "*"
  ],
  "realm_access": {
    "roles": [
      "read",
      "default-roles-my-spring-realm",
      "offline_access",
      "uma_authorization"
    ]
  },
  "resource_access": {
    "account": {
      "roles": [
        "manage-account",
        "manage-account-links",
        "view-profile"
      ]
    }
  },
  "scope": "openid email profile",
  "sid": "5fa398eb-bffd-4dd0-abda-e9a5a5bf58b8",
  "email_verified": false,
  "preferred_username": "user1-r",
  "given_name": "",
  "family_name": ""
}
As you can see, the "user1-r" has the "read" role granted/assigned to it.
#
Spring Boot Application creation
Here is the code of my Spring Boot application:
package com.demo.springsecurity;

import org.springframework.boot.SpringApplication;
import org.springframework.boot.autoconfigure.SpringBootApplication;

@SpringBootApplication
public class SpringSecurityApplication {

	public static void main(String[] args) {
		SpringApplication.run(SpringSecurityApplication.class, args);
	}
}<?xml version="1.0" encoding="UTF-8"?>
<project xmlns="http://maven.apache.org/POM/4.0.0" xmlns:xsi="http://www.w3.org/2001/XMLSchema-instance"
xsi:schemaLocation="http://maven.apache.org/POM/4.0.0 https://maven.apache.org/xsd/maven-4.0.0.xsd">
<modelVersion>4.0.0</modelVersion>
<parent>
<groupId>org.springframework.boot</groupId>
<artifactId>spring-boot-starter-parent</artifactId>
<version>3.1.1</version>
<relativePath/> <!-- lookup parent from repository -->
</parent>
<groupId>com.demo</groupId>
<artifactId>spring-security</artifactId>
<version>0.0.1-SNAPSHOT</version>
<name>spring-security</name>
<description>Demo project for Spring Boot & Spring Security</description>
<properties>
<java.version>17</java.version>
</properties>
<dependencies>
<dependency>
<groupId>org.springframework.boot</groupId>
<artifactId>spring-boot-starter-security</artifactId>
</dependency>
<dependency>
<groupId>org.springframework.boot</groupId>
<artifactId>spring-boot-starter-web</artifactId>
</dependency>
<dependency>
<groupId>org.projectlombok</groupId>
<artifactId>lombok</artifactId>
<optional>true</optional>
</dependency>
<dependency>
<groupId>org.springframework.boot</groupId>
<artifactId>spring-boot-starter-test</artifactId>
<scope>test</scope>
</dependency>
<dependency>
<groupId>org.springframework.security</groupId>
<artifactId>spring-security-test</artifactId>
<scope>test</scope>
</dependency>
<!-- https://mvnrepository.com/artifact/com.google.code.gson/gson -->
<dependency>
<groupId>com.google.code.gson</groupId>
<artifactId>gson</artifactId>
<version>2.10.1</version>
</dependency>
<!-- https://mvnrepository.com/artifact/org.springframework.boot/spring-boot-starter-oauth2-client -->
<dependency>
<groupId>org.springframework.boot</groupId>
<artifactId>spring-boot-starter-oauth2-client</artifactId>
<version>3.1.1</version>
</dependency>
</dependencies>
<build>
<plugins>
<plugin>
<groupId>org.springframework.boot</groupId>
<artifactId>spring-boot-maven-plugin</artifactId>
<configuration>
<excludes>
<exclude>
<groupId>org.projectlombok</groupId>
<artifactId>lombok</artifactId>
</exclude>
</excludes>
</configuration>
</plugin>
</plugins>
</build>
</project>server.port=9000
keycloak.use-resource-role-mappings=false
spring.security.oauth2.client.registration.keycloak.client-id=employee-management-service
spring.security.oauth2.client.registration.keycloak.client-secret=5bbpbJoIlYvhHrCT4YrGqyqFBes6tc1w
spring.security.oauth2.client.registration.keycloak.scope=openid
spring.security.oauth2.client.registration.keycloak.authorization-grant-type=authorization_code
spring.security.oauth2.client.registration.keycloak.redirect-uri=http://localhost:9000/login/oauth2/code/employee-management-service
spring.security.oauth2.client.provider.keycloak.issuer-uri=http://localhost:8080/realms/my-spring-realmpackage com.demo.springsecurity.controller;
import org.springframework.beans.factory.annotation.Autowired;
import org.springframework.context.ApplicationContext;
import org.springframework.security.core.Authentication;
import org.springframework.security.core.context.SecurityContext;
import org.springframework.security.core.context.SecurityContextHolder;
import org.springframework.web.bind.annotation.*;
@RestController
@RequestMapping("/employee")
public class EmployeeController {
@Autowired
private ApplicationContext context;
@GetMapping(value="/info")
String info() {
SecurityContext securityContext = SecurityContextHolder.getContext();
Authentication a = securityContext.getAuthentication();
var returnVar = "<p> Authenticated with (/info) : "+a.getName() + "</p> <p> authorities="
+a.getAuthorities()+"</p><p> info="+a.getDetails()+"</p>";
return returnVar;
}
@GetMapping(value="/info-r")
String infoR() {
SecurityContext securityContext = SecurityContextHolder.getContext();
Authentication a = securityContext.getAuthentication();
var returnVar = "<p> Authenticated with (/info) : "+a.getName() + "</p> <p> authorities="
+a.getAuthorities()+"</p><p> info="+a.getDetails()+"</p>";
return returnVar;
}
@GetMapping(value="/info-w")
String infoW() {
SecurityContext securityContext = SecurityContextHolder.getContext();
Authentication a = securityContext.getAuthentication();
var returnVar = "<p> Authenticated with (/info) : "+a.getName() + "</p> <p> authorities="
+a.getAuthorities()+"</p><p> info="+a.getDetails()+"</p>";
return returnVar;
}
}package com.demo.springsecurity.config;
import org.springframework.context.annotation.Bean;
import org.springframework.context.annotation.Configuration;
import org.springframework.security.config.annotation.web.builders.HttpSecurity;
import org.springframework.security.config.annotation.web.configuration.EnableWebSecurity;
import org.springframework.security.core.GrantedAuthority;
import org.springframework.security.core.authority.SimpleGrantedAuthority;
import org.springframework.security.core.authority.mapping.GrantedAuthoritiesMapper;
import org.springframework.security.crypto.bcrypt.BCryptPasswordEncoder;
import org.springframework.security.crypto.password.PasswordEncoder;
import org.springframework.security.oauth2.core.oidc.user.OidcUserAuthority;
import org.springframework.security.oauth2.core.user.OAuth2UserAuthority;
import org.springframework.security.web.SecurityFilterChain;
import java.util.Collection;
import java.util.HashSet;
import java.util.Map;
import java.util.Set;
import java.util.stream.Collectors;
import static org.springframework.security.config.Customizer.withDefaults;
@Configuration
@EnableWebSecurity
public class ProjectSpringSecurityConfig {
@Bean
public SecurityFilterChain filterChain(HttpSecurity http) throws Exception {
http
.authorizeHttpRequests(authorize -> authorize
.requestMatchers( "/employee/info-r").hasAnyRole("read")
.requestMatchers( "/employee/info-w").hasAnyRole("write")
.anyRequest().authenticated()
)
.oauth2Login(withDefaults());
return http.build();
}
@Bean
// This class takes the roles from the access token
public GrantedAuthoritiesMapper userAuthoritiesMapperForKeycloak() {
return authorities -> {
Set<GrantedAuthority> mappedAuthorities = new HashSet<>();
var authority = authorities.iterator().next();
boolean isOidc = authority instanceof OidcUserAuthority;
if (isOidc) {
var oidcUserAuthority = (OidcUserAuthority) authority;
var userInfo = oidcUserAuthority.getUserInfo();
if (userInfo.hasClaim("realm_access")) {
var realmAccess = userInfo.getClaimAsMap("realm_access");
var roles = (Collection<String>) realmAccess.get("roles");
mappedAuthorities.addAll(generateAuthoritiesFromClaim(roles));
}
} else {
var oauth2UserAuthority = (OAuth2UserAuthority) authority;
Map<String, Object> userAttributes = oauth2UserAuthority.getAttributes();
if (userAttributes.containsKey("realm_access")) {
var realmAccess = (Map<String,Object>) userAttributes.get("realm_access");
var roles = (Collection<String>) realmAccess.get("roles");
mappedAuthorities.addAll(generateAuthoritiesFromClaim(roles));
}
}
return mappedAuthorities;
};
}
// "ROLE_" must be added for being understandable by Spring Boot
Collection<GrantedAuthority> generateAuthoritiesFromClaim(Collection<String> roles) {
return roles.stream()
.map(role -> new SimpleGrantedAuthority("ROLE_" + role))
.collect(Collectors.toList());
}
}In this configuration, PasswordEncoder is not configured as the authentication is done by Keycloak
(the authorization server).
#
Testing OAuth
Now let's try the OAuth2 in the browser (as we are exposing GET requests).
Let's go to the localhost:9000/employee/info and we will get something like this:

I enter "user1-r" and password "u" and click on "Sign In".
I will see the result of the request:

Now I can access localhost:9000/employee/info-r and the result will be the same (no login required).
When I access http://localhost:9000/employee/info-w I will receive a 403 error message:

Enjoy OAuth2 with Spring Boot !